Father’s Day Gifts Perfect for Coffee Loving Dads
Today I'm sharing some treasured Father's Day gifts that we made for my husband. They have been well loved and are still in use in our house years later! These personalized mug and saucer sets have been one of my favorite DIY Father's Day gifts!

Father's Day Gifts – A Tale of Trial and Error
Father's Day and my husband's birthday are tricky holidays for me. He already has whatever he wants. If not, I'd usually rather he pick it out so he gets what he wants! We've done some DIY gifts in the past but they have just been made for the sake of making them, and not always the most useful items. But this time, I thought I had an idea for a DIY gift that he would really use! Coffee and espresso mugs! He drinks both so I have both for him!
At the time, Ladybug wasn't exactly producing recognizable artwork. While it would be totally fine to just let her doodle, I thought we would try tape resist as a way to make it hers, but also leave a clean design behind. It took three tries but I finally found a method I liked. And then I totally ruined them…
What Didn't Work
Here is where I tell you what didn't work. Which is to say, the first THREE things that I tried! But let's not get ahead of ourselves. I had this whole post written up, pictures and all, before I ran them through the dish washer.
As usual, I attempted this first on my own during naptime. I placed cut up pieces of painter's tape on a coffee mug in the shape of #1 Dad and a heart, and then colored over it with Sharpies. I was a little surprised that the markers bled a little under the painter's tape. I don't mind the look of it, but it was unexpected and I wanted to share that in case it matters to anyone else.
Next onto scotch tape. Here is a suggestion- if you are going to make a shape that is wider than one piece of tape, overlap the pieces of tape first then cut it out as one big piece, rather than trying to fit it together one piece of tape at a time. But the scotch tape rippled a little along the edges where it conformed the bend of the mug. When I removed the tape the color bled there too.
A Few More Errors Along the Way
For a while the scotch tape was my best shot, so I had a mug all ready for Ladybug to color, along with the (Gulp!) permanent Sharpie markers. Here is what happened – wait for iiiiit . . . Nothing. She had no desire to do it at all. I asked a few different times over the span of 2 days.
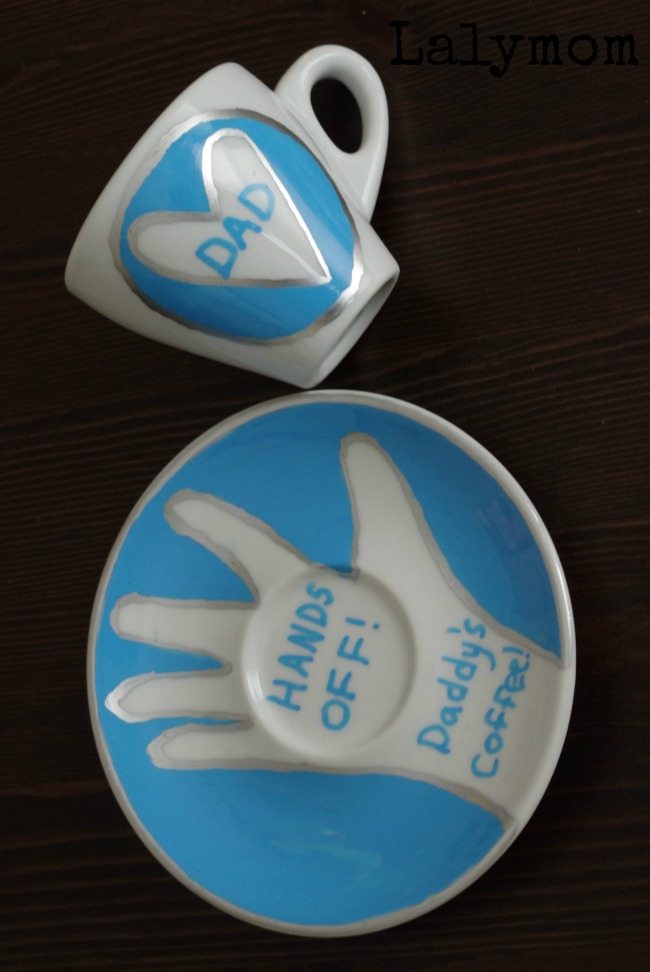
I did think of a way to get the kids involved in the mean time, and Ladybug was totally on board with this little task. We made “Hands off Daddy's Coffee!” saucers for the espresso cups. We started by tracing each kid's hand, then I cut it out, traced carefully on the saucer then we both did a little of the coloring…but it was mostly me again.
The AHA Moment!
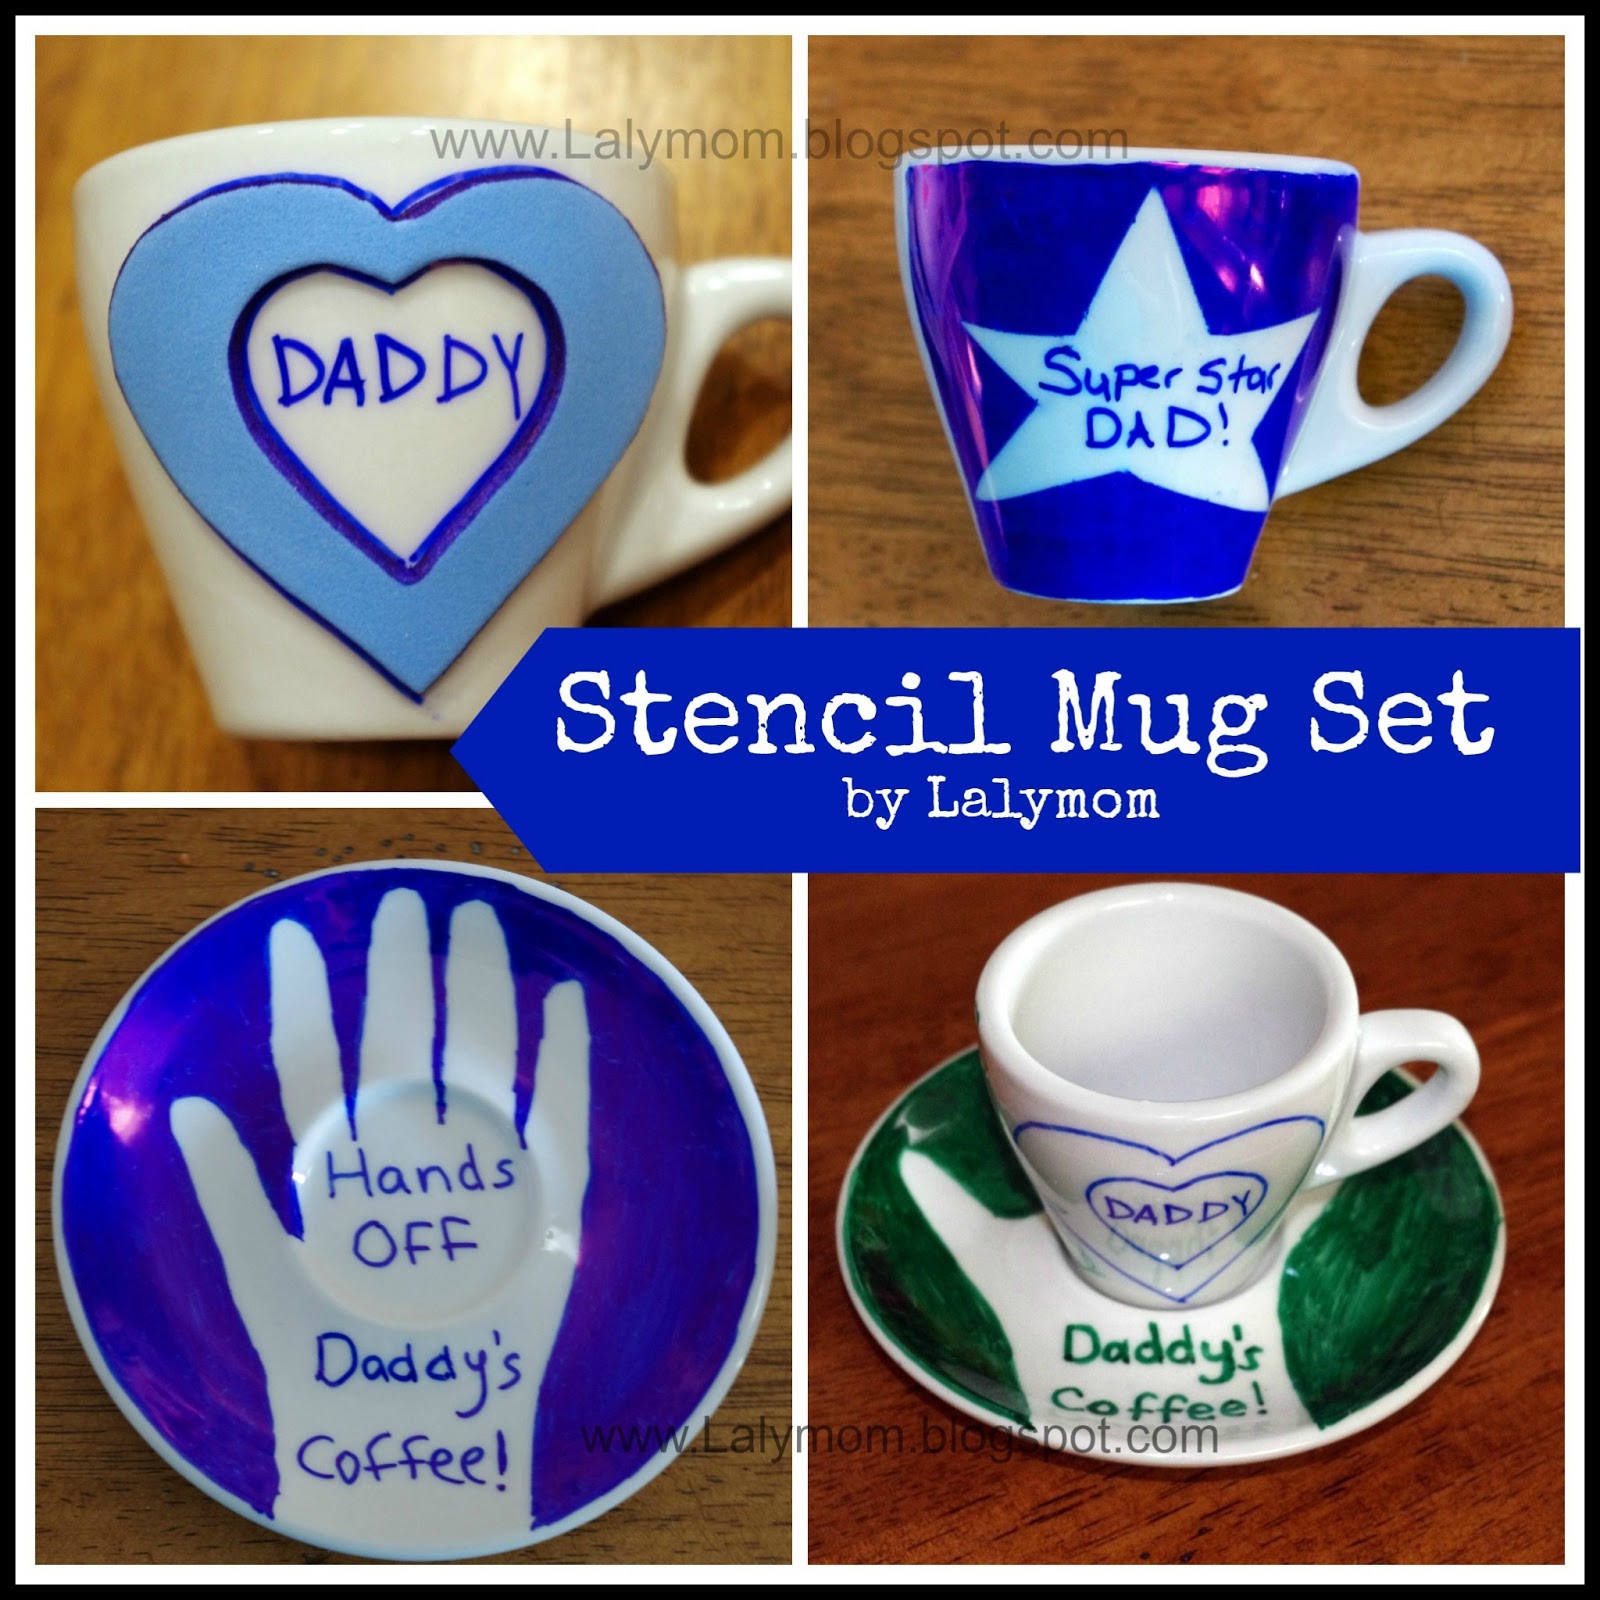
I knew there had to be another way to use, essentially, a stencil on a mug. Finally it hit me. Foam stickers! You have to experiment a little to make sure you have one that will stick but this heart shaped one worked well on my mug. Ladybug saw me doing this and sat in my lap. I put the sharpie in her hand and told her I was making a gift for Daddy. She started writing him a letter on the mug! It says, “Daddy I hope you have a good day, I miss you. Love, (Her name)” Hooray!
The AWW NUTS Moment!
So they were all ready for gifting. But then I thought, I'd better just put them through the dish washer, juuust to make sure.
And they turned into this:

I didn't give up though! I Googled and Googled and found many people suggest using the oil based paint Sharpies, letting them dry over night, and then baking them at 350 for 35 minutes.
So I grabbed a bunch of rubbing alcohol, rubbed all the ink off and started over. I bought my markers individually at Joann Fabrics. They had a display near the registers, in case your store clerk also doesn't know where to find them! 🙂 I did use the foam stickers and the tracings of the kids hands and I like the way they turned out. Hooray! Fourth time is a charm!
How to Make Father's Day Gifts for the Coffee Lover
Want to make a mug or espresso cup set of your own? Here is what you need (with affiliate links):
- Mugs and saucers if desired. (I purchased these coffee mugs from Amazon, which are stackable, chip resistant and shock resistant. I also ordered these simple espresso cups with saucers.)
- Rubbing alcohol to wipe the mugs clean
- Foam Stickers to use as stencils (bought mine a few years ago at Michaels)
- Oil Based Paint Sharpies (or Porcelain 150 markers, as Color Me Happy found, also the hard way before making a crazy adorable set of doodle mugs…wish I'd seen her post a week ago!)
- Oven
Clean the mug with rubbing alcohol and make sure all hands are dry. Affix the foam sticker to the mug. Either trace or allow child to color all around the shape, leaving the blank void under the sticker.
Add any message you want, such as child's name, Happy Father's Day, or the year. Be sure not to handle the mug where it has been drawn on or the marker will smudge!
Let dry for 24 hours. Place on a sheet pan with a ridge (to keep them from sliding off). Place in cold oven and set to 350. Once pre-heated, bake for 35 minutes. Let cool in oven before removing. Done!

If you enjoyed this project please pin it as a reminder to try it out! Follow along with the fun on our facebook and pinterest pages!


Ha, I love your post! Isn’t that just an awful feeling when you an “aww nuts” moment. The other week I made some rock stamps for a post. Right after I hit publish I realized that all my pictures had rocks with letter foam stickers on them and you can’t stamp letters unless you put them on backwards. I had to redo my entire post. I love how you turned your aww nuts into a hooray! They turned out adorable and I love the Hands of Daddy’s Coffee plate. Such a cute idea.
Sam, thanks for the comment, hilarious about the rock stamps! I am sure I would have done the same thing! And I am sure it would not have been hilarious at the time! Thanks for the kind words!
Would love for you to share this at my link up where we pin all those who join to our party pin board http://myfashionforwardblog.com/all-things-pretty-11/
Thanks Leslie, just added it, looking through other submissions and your blog now! Have a great day!
That is a cute project for Father’s Day. Thank you for sharing what works and what doesn’t. It’s funny how crafts emerge from trial and error. The end result came out great! Thanks for sharing this post on Artsy Play Wednesday. Pinned it (http://pinterest.com/pin/94575660897853024/).
: 0 ) Theresa (Capri + 3)
Thanks for the nice comment and for pinning. I do like the end result better than the originals but I sure spent a lot of time on those first ones just to have them wash off! Ha! Thanks so much!
I was so nervous I’d see this when I took my dishes out of the dishwasher! I’m sorry that happened to all your hard work. Thanks for stopping by my post about decorating dishes with alcohol inks!
Natashalh
This is just precious! Thank you for linking at All Things Pretty. I shared it on my FB page and pinned it!
What a cute project for fathers day! I am a new from southern charm! I would love for you to check out my blog and hopefully follow me back! Nicole
What a cute project for Father’s Day! Love the idea!
Hi! Stopping by from Mom Bloggers Club. Great blog!
Have a nice day!
So adorable! One year we made the handprints of each child across a tshirt for him. It’s hard to find or make nice gifts that are going to go to use. This is really cool!
Sharon
http://makeitorfixit.com
That’s brilliant!
Thanks for linking up with us at Pin It Tuesday!
Join us again next week to see if you were featured!
PowerfulMothering.com
You can also use contact paper. Trace your kid’s hands or draw whatever and it goes on smoothly, but isn’t difficult to peel off.
Bah! Genius! Thank you soo much! I love that idea!
Woah, a lot of effort went into that gift. I hope he liked it! 🙂
Thanks for linking up for Mummy Mondays.
These are so adorable. I love personalized gifts. Fun things for the kids to help with.