DIY Pinocchio Costume “Wooden” Arms & Legs
Inside: You will learn an easy trick to make Pinocchio Costume wood grain arms and legs, to give anyone that wooden puppet look. They pair great with the DIY Growing Pinocchio Nose that I made. This was made for a stage production of Shrek the Musical, but would also work for My Boy Pinocchio, for Halloween, for School Book Character Day or any other fairy tale cosplay opportunity. Partner affiliate shopping links are included in this tutorial.
Our local middle school chose Shrek the Musical for the school play this year. I joined our amazing costume committee and had such fun working with the other parents behind the scenes.
For Pinocchio we started with some basics:
- Pinocchio Costume Accessory Set
- Blue Shorts
- White Button Down Shirt (ours was from the existing costume closet)
- Blue Converse Shoes
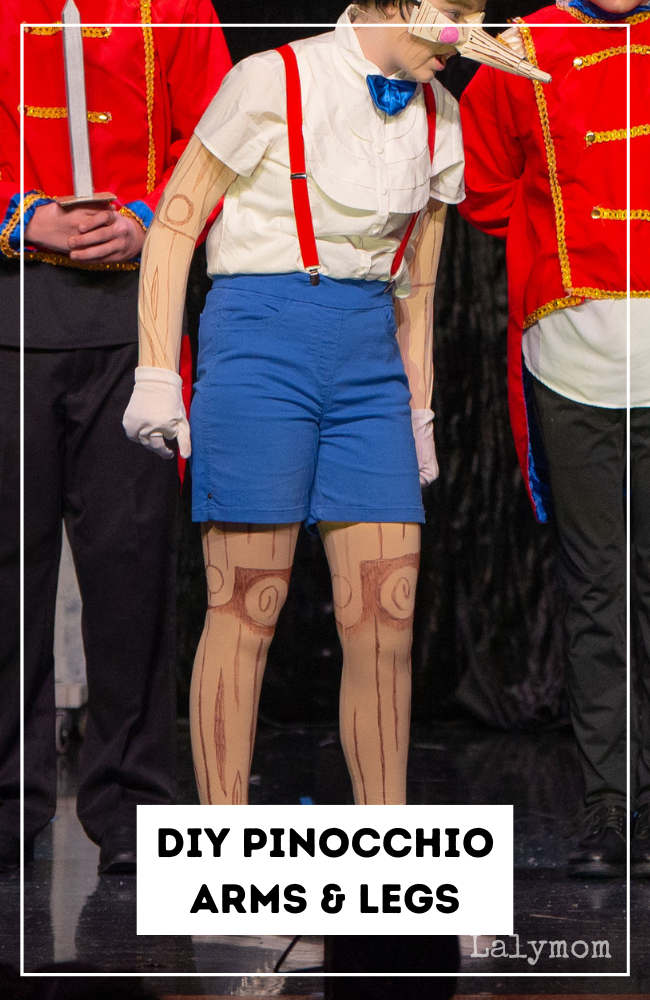
One project that I worked on at home a lot was making Pinocchio into a wooden puppet. If he was going to be made of wood, he would need wood grain arms and legs. It was a nice touch to add to that Wooden Puppet look. Here is a simple way to make these costume pieces.
Note: These Pinocchio puppet arms and legs costume pieces were modeled after the arms and legs of the Pinocchio costume from Shrek the Musical on Broadway. You can see the them in the video below. While working on them, I looked at screenshots of his arms and legs to draw the joints. To see the arms you can pause around 2:14 and 2:55. Go to 5:50 and 6:06 for the legs. BUT it's a great interview for any theatre lover, so be sure to watch the whole thing! I can't believe he played so many roles in one show.
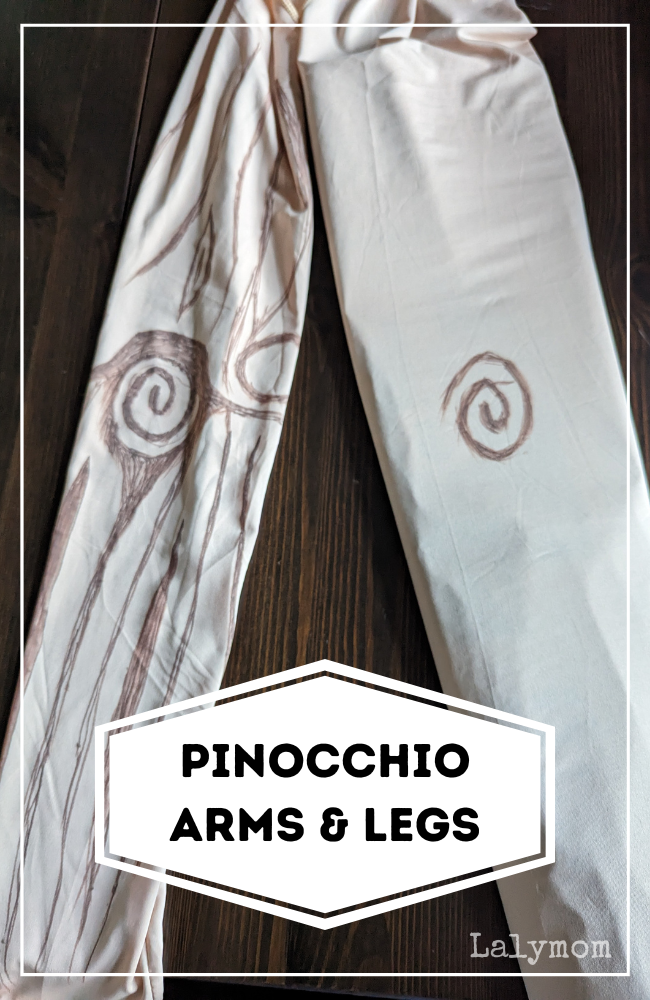
- Nude Sleeves
- Nude Leggings
- Brown Permanent Markers (fine tip, NOT ultra fine) The Michaels Brand also worked nicely but was a different tone of brown.
- Newspaper or other foldable material
Instructions for Making Pinocchio Costume Arms & Legs
RELATED: See how to make the Growing Pinocchio Nose picture above
Okay the quick version is obviously:
- Buy sleeves and leggings.
- Draw wood arms and legs.
But below is a more detailed explanation, with tips I learned along the way. Might be helpful to read through them before you get started.
- Try the sleeves and leggings on the person who will be wearing them. Assuming it is a good fit, and you don't need to exchange or return them, you can begin.
- Move the leggings and sleeves around until they are aligned correctly, with the seems straight and stretched or shifted where you want them. Try to remove any wrinkles or gathers. (We found the leggings in particular to be very long so it was easy to have them bunched up in different places. In the image above you can see that the knees were up too high, as we forgot to align them on the actor when getting dressed.)
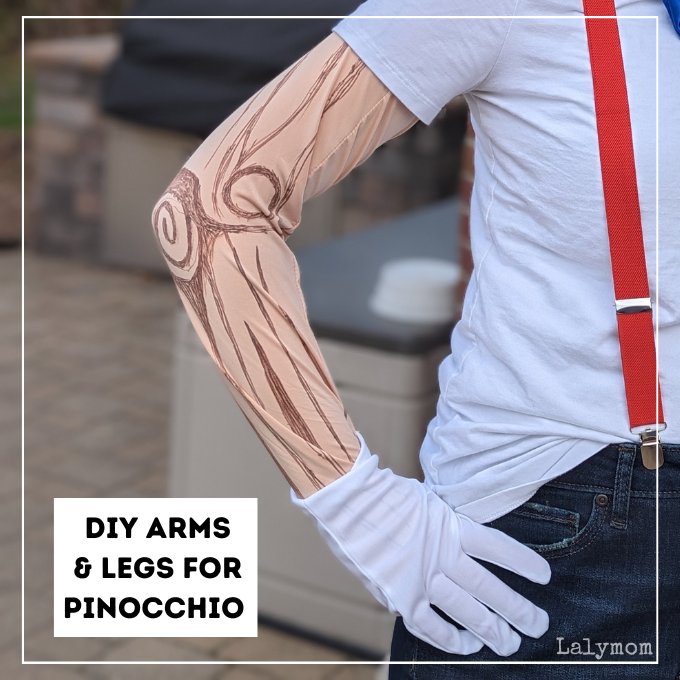
- While still wearing them, using the permanent marker, lightly draw an oval one each sleeve around each elbow (roughly 3 inches tall and 2 inches wide) and lightly draw ovals on the leggings around the knee caps (depending on the size of your person, roughly 3-4 inches wide by 4 inches tall).
- Take the sleeves and leggings off.
- Neatly fold up a newspaper or another foldable material to stuff inside the clothing item to avoid the marker bleeding through to the other side. Make sure whatever you use isn't going to snag or rip the fabric. Insert the folded item into one leg or arm where you want to get started. If you move on to another section, be sure to shift the newspaper to avoid bleeding through on accident.
- Using the brown permanent marker, start with an elbow or knee, modeling after the images in the video, draw a bit of a spiral inside the light oval, which joins the oval you traced on the actor. Darken around the original oval that you traced on the actor. Add 1 inch circles on both sides of the joint, to look like the peg is going through the joint (see sides of knees and elbows in the pictures). Complete the joint by drawing a line across the back of each elbow and knee to show the separation of the two wood pieces.
- Once your joint is drawn, add the wood grain and some knots to the top and bottom wood pieces. Make sure that you continue the design far enough to go from the shorts to the socks, and from the shirt to the glove.
RELATED ARTICLE: BIG List of Fun Stuff For Your Theatre Kids To Do Between Shows
There you have it! Your very own wood grain legs, the perfect addition to any Pinocchio costume.
