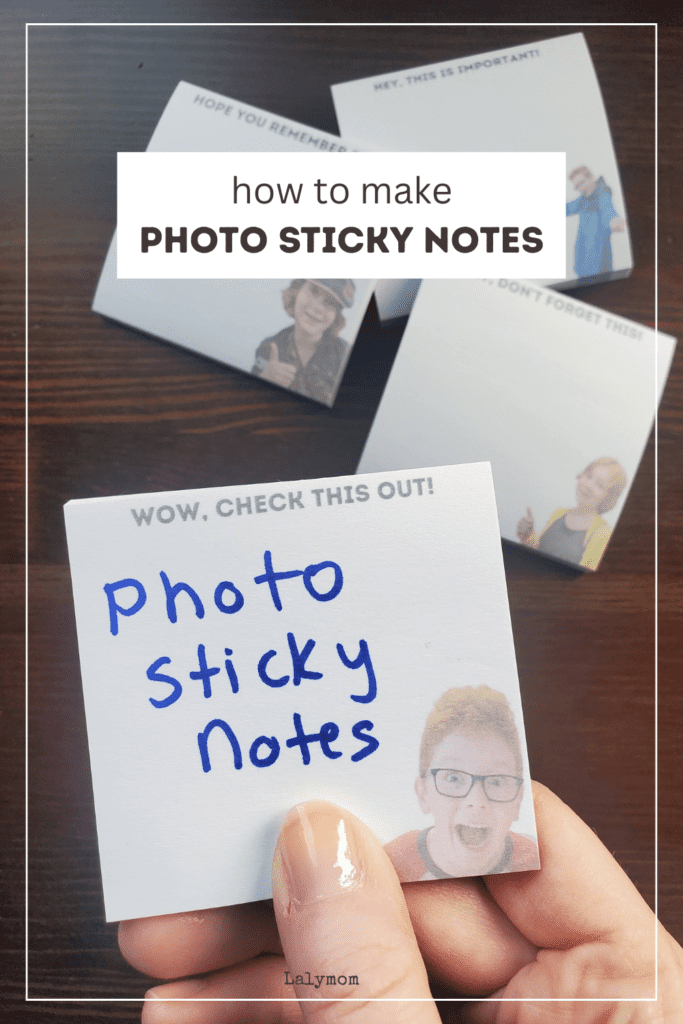
How to Make Custom Photo Post-It Notes
Today we are showing you how to make custom printed photo notes, printed on real Post-It Brand sticky notes! These are super fun any time of the year but we use them as annual Christmas gifts for grandparents, aunts and uncles. This tutorial shows step by step instructions to go from photo to funny custom printed post-it notes, using two of my favorite partner websites: Canva and Shutterfly. Partner referral links are used in this easy tutorial.
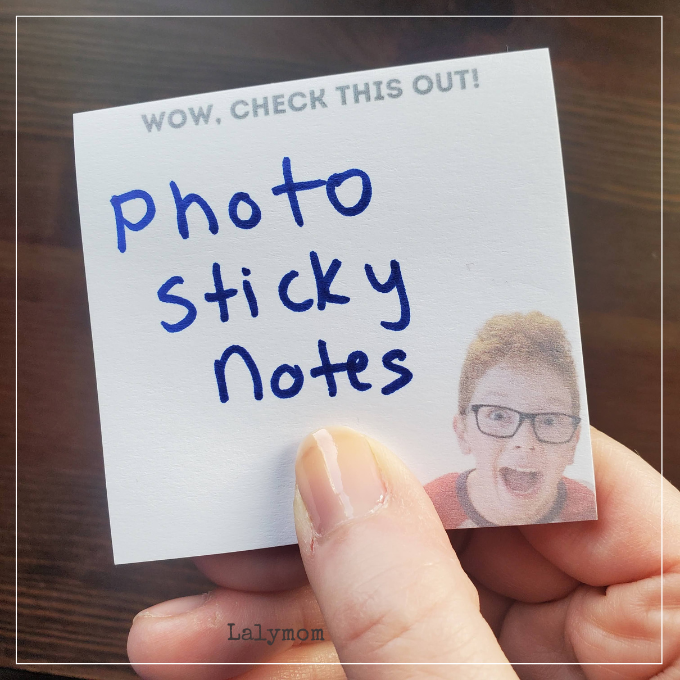
Photo gifts have been my go-to choice for holiday gifts ever since our kids were born. Dad, Grandparents, Aunts, Uncles, Cousins, Teachers. Everybody gets photo gifts!
So now everyone seems to have a collection of mugs with my kids' mugs on them, and you can only add so many photo magnets and keychains.
I was looking for something useful that wouldn't clutter up the cabinets for the next 20 years. (Although we still do use all the other photo gifts, we just don't need more of them!)
My lovely step mother is a frequent sticky notes user so one year I thought it would be cute to make her some with the kids' photos. They turned out so cute (and there was a sale) so I ended up ordering enough for a bunch of family members. They were a big hit!
Sticky notes are so useful, and I love that every time you go to use them it puts a smile on someone's face.
But most of us don't have perfect photos of our kids standing in front of a white wall.
So how do you take a super cute photo of you, your kids, your dog- anyone- and get it to look nice, and print it onto a sticky note?
I'll walk you through it!
You will be using two websites:
- Canva -Easy to use Graphic Design website used to create a simple layout of your image (Free and Paid options, This Canva Link Gets you a 30 Day Pro Trial.)
- Shutterfly – Popular photo gift website where you can order the custom print Post-It Brand sticky notes (free to use but obviously you pay for the items you order.)
Design a Custom Photo Sticky Note (Includes Tutorial for Removing Photo Background)
The first step in making custom photo sticky notes is designing the image you want on the sticky note.
Shutterfly does have templates that allow you to just pop your photos right in to a layout. If that is what you want, then you can skip this tutorial and head on over to shutterfly and search for Post-It Notes to find a photo layout that you like.
If you want to make a design like mine, where you remove the background and add your own words, this is the tutorial for how to do it.
Please note: The background remover tool on Canva (as well as the one on PicMonkey) is a feature of the Canva Pro paid subscription. Get a Free 30 Day Canva Pro Here.
I use Canva a lot- for holiday cards, photo gifts, Girl Scout Cookie thank you cards, as well as for images for my website. If you can use Word or Publisher, you can find your way around this, especially with my tutorial below.
Most of us don't have photos of people posed in front of a white background like in my sticky note, so here is how to take a photo and get just the person, without the background.
- Go to Canva.com and login.
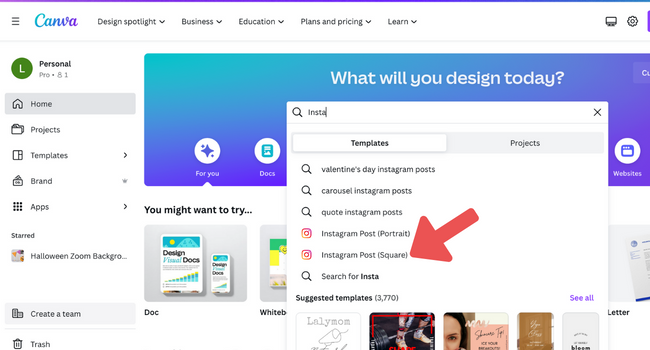
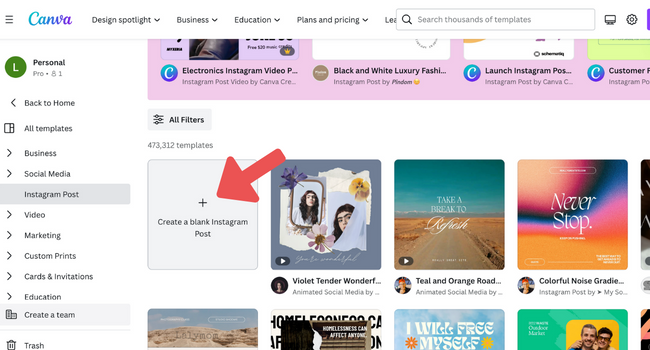
- Where it says, “What Will You Design Today?” Search for Instagram Post (Square).

- Once results show up, select the gray box that says “Create Blank Instagram Post.” This will be the top left of the results, but you might have to scroll down a little to see it.
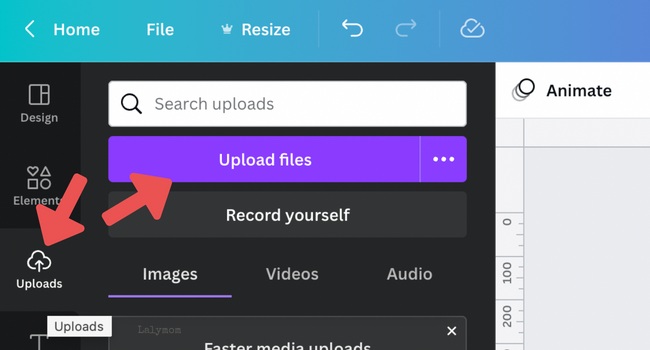
- Now you should be on a graphic design type of dashboard. Along the lefthand side, click Uploads. This will pop open the area where you can upload the photo you want to use. Click the purple “Upload Photos” button and find the photo you want to upload.
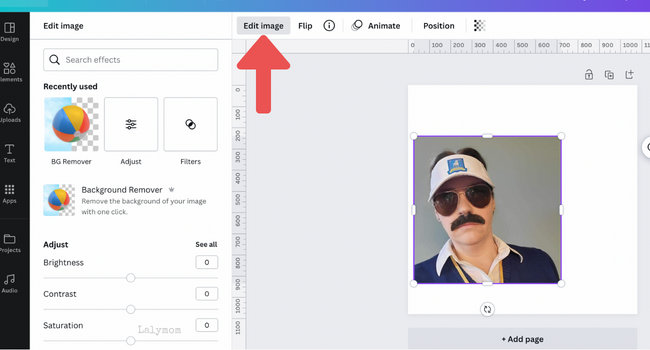
- Once it is uploaded drag the photo onto the blank square and place it anywhere in the blank square. Along the top of the work space click “Edit Image.” (If you don't see the words Edit Image, click on the photo you just added, then some text will appear above it. You should see Edit Image now. )This opens up an image editing menu beside your photo.
- In the Image Editing menu that just opened, select BG Remover (Again this is a Canva Pro feature). Give it a couple minutes, it's thinking, and then poof! The background should be gone. (If the image doesn't look the way you want it, see below tips for troubleshooting the background remover.) If it looks good, click Done.
- Now you can adjust the size, position and rotation of the person or pet in the image. Feel free to add text or any other design elements. Please leave more room than you think you need around the edges to allow for bleed. See below for tips.
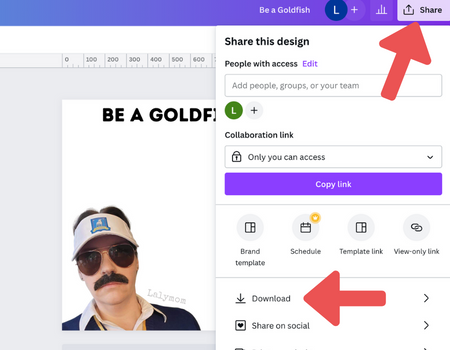
- When you have it the way you like it, at the top right corner of the screen click the Share button. Towards the bottom of the Share menu, select “Download”. There are options to change the file format and file size here, but I tend to leave it as it is and click the “Download” button. Now the file should be saved to your computer and ready for your photo gift website (I use Shutterfly, see tutorial below).

Troubleshooting Tips for BG Remover
If you use the BG Remover Tool and it doesn't look right, you can try a couple things to see if it helps.
Right after the BG Remover finished removing the background, in place of the BG Remover button you will see and Erase Button and a Restore Button.
If some of the background remains, or there is any part of the image that you want to erase, you can use the erase button. Click the Erase button. You can make the eraser bigger or smaller, right below the Erase Button. You can also zoom in on your photo using the zoom slider at the bottom of the screen, below your photo.
If the BG Remover erased too much, you can click the Restore button to restore parts of the image that you want to keep. Same thing, you can adjust the size of the restore brush bigger or smaller, and you can zoom in on your photo as well.
Tips for Designing Your Post-It Note Image
Here are a few more tips that I have learned over the years to help with getting your photo gift just right.
- Leave a little bit of room all the way around your Instagram Square Image for bleed. Bleed is the term for the part of the image that is printed off the edge of the paper.
- Leave the project open on Canva even if you think you got it JUST right. Often times Shutterfly or other photo gift websites might crop things just a little bit weird and you'll need to log back in to adjust it. I just accept those little adjustments as part of the process.
- If you want to add text like I did, on Canva, on the left side, select Text, then add subtitle. This will open up a spot to type on your Instagram square. I used the font INTRO RUST. Remember to leave a dot more space than you think you want on your finished project, due to bleed.
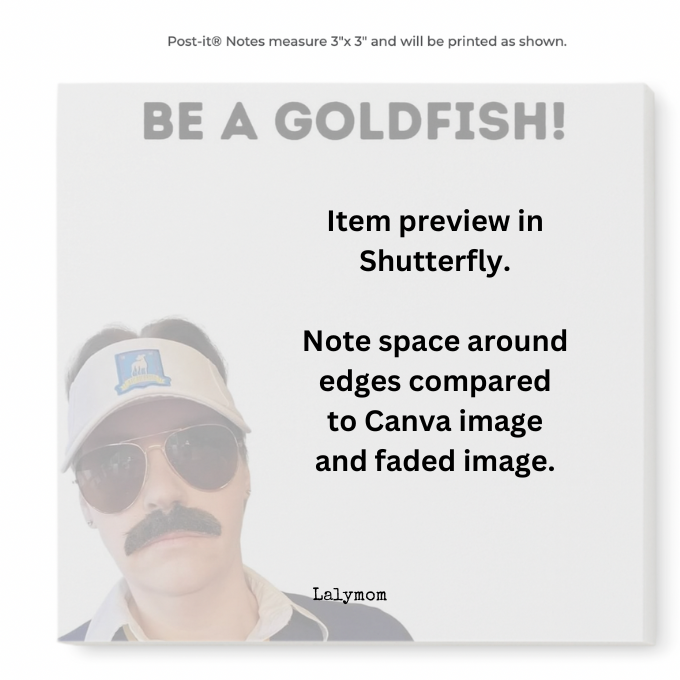
- The Design Your Own custom printed Post-It Notes on Shutterfly are automatically printed slightly faded, so that they can be used as a post it note in the event that you do leave the photo background. If you want to adjust your photo image darker or more vibrant do it in Canva first.
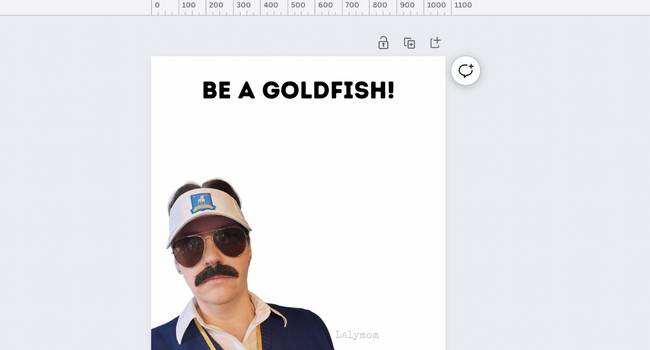
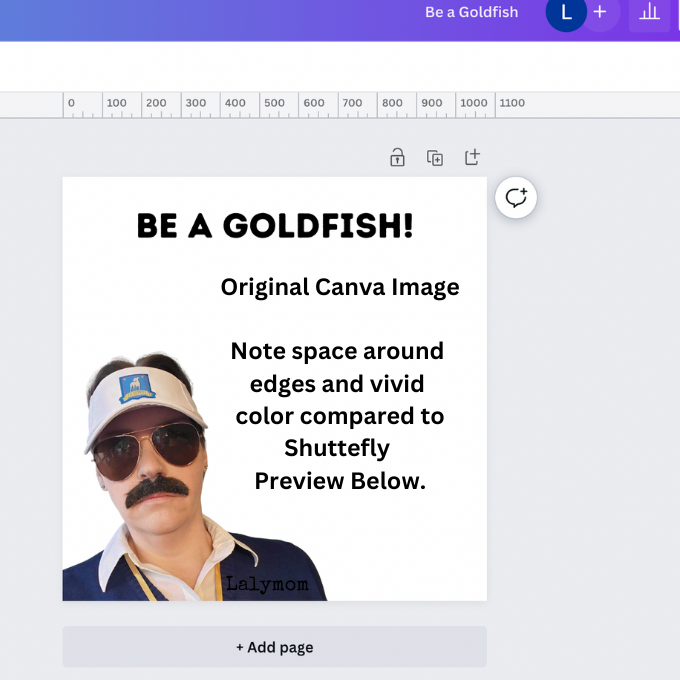
See the two images below to compare the bleed and image colors from the Canva image and Shutterfly item preview, since it bleeds off the edge of the paper.
Canva Image:
What it will look like printed on a Custom Photo Post-It Note:
Funny Ideas for Post-It Note Headlines
If you want to take a photo of yourself, a friend or family member and add a funny saying above it on the post it, you can add whatever you like. Here is some fun options:
- Wow, Check This Out!
- Hey, This is Important!
- Remember this!
- Hope You Don't Forget This!
- I Love You Because:
- You're a Great (Teacher, Mom, Dad, Grandma, Principal, Boss, etc) Because:
- (Name of person in photo) Wants You To Know:
Let's hear your fun ideas and uses for Post-It Notes in the comments below.
How to Order Custom Photo Post-It Notes
Whether you have used the design tutorial above or not, it is really very easy to order Custom Photo Post-It Notes.
- Head on over to Shutterfly.com (My Shutterfly partner links have today's best deals and codes pre-loaded!)
- At the top right corner search for Post-It Notes.
- Select the “Upload Your Own Design” option. It may appear as a rectangle instead of a square but both options are on the same order page.
- Once you are on the item page, select the Square option, then click personalize.
- At the bottom click Add Photos and select Upload from your computer. Select the image you saved from Canva or the photo you want to add.
- Once it is uploaded drag it onto the project. It will look wonky. Don't panic yet.
- Click on the photo and it will bring up a window to adjust it. Drag the box as big as it can go in relation to your square image and see how the cropping looks.
- If you need to adjust it, just go back to Canva and adjust it. Download it from canva, then add it to your Shutterfly project.
- Once you are happy, you can add it to your cart and order as many as you want.
I hope you enjoyed this tutorial for Custom Photo Post-It Notes! Let me know if you end up ordering any or any funny Post It Note ideas you have in the comments below.
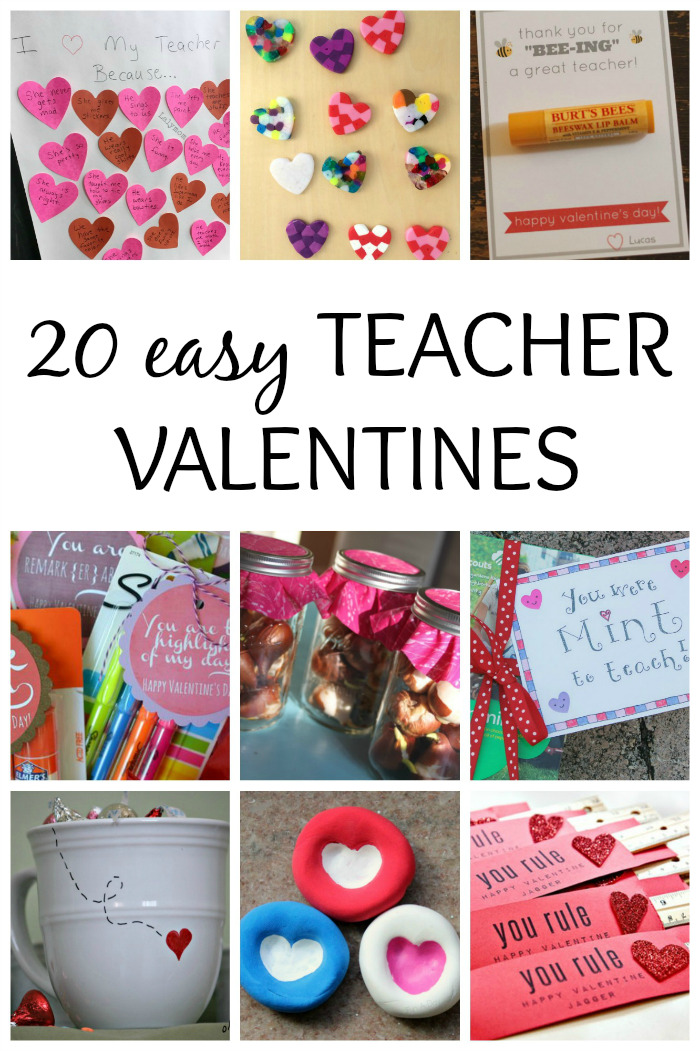
Pin this fun gift idea!