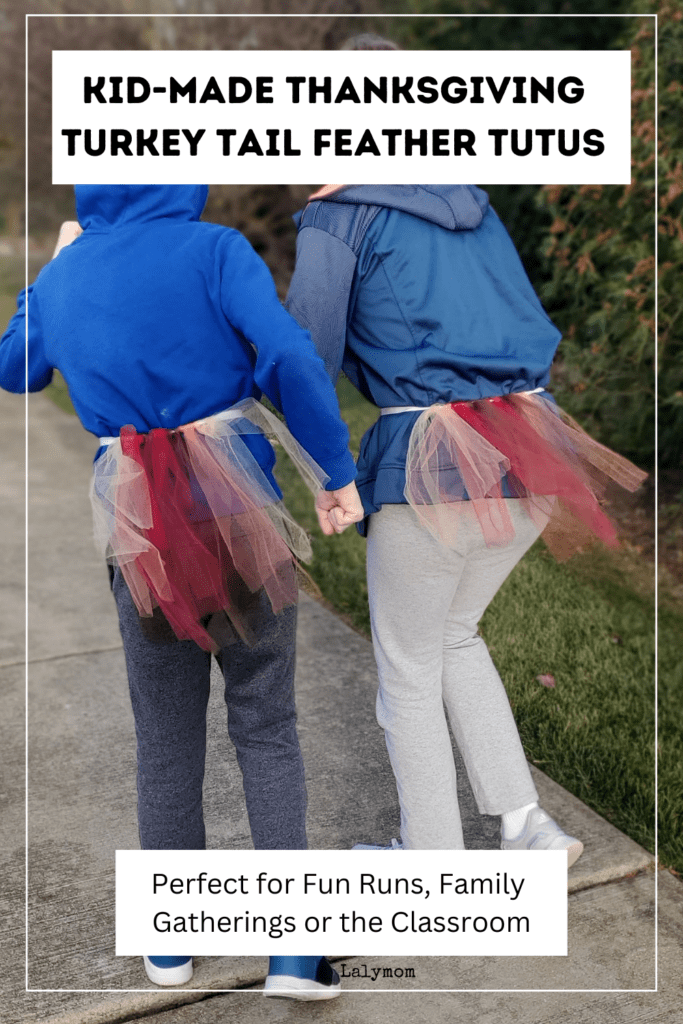
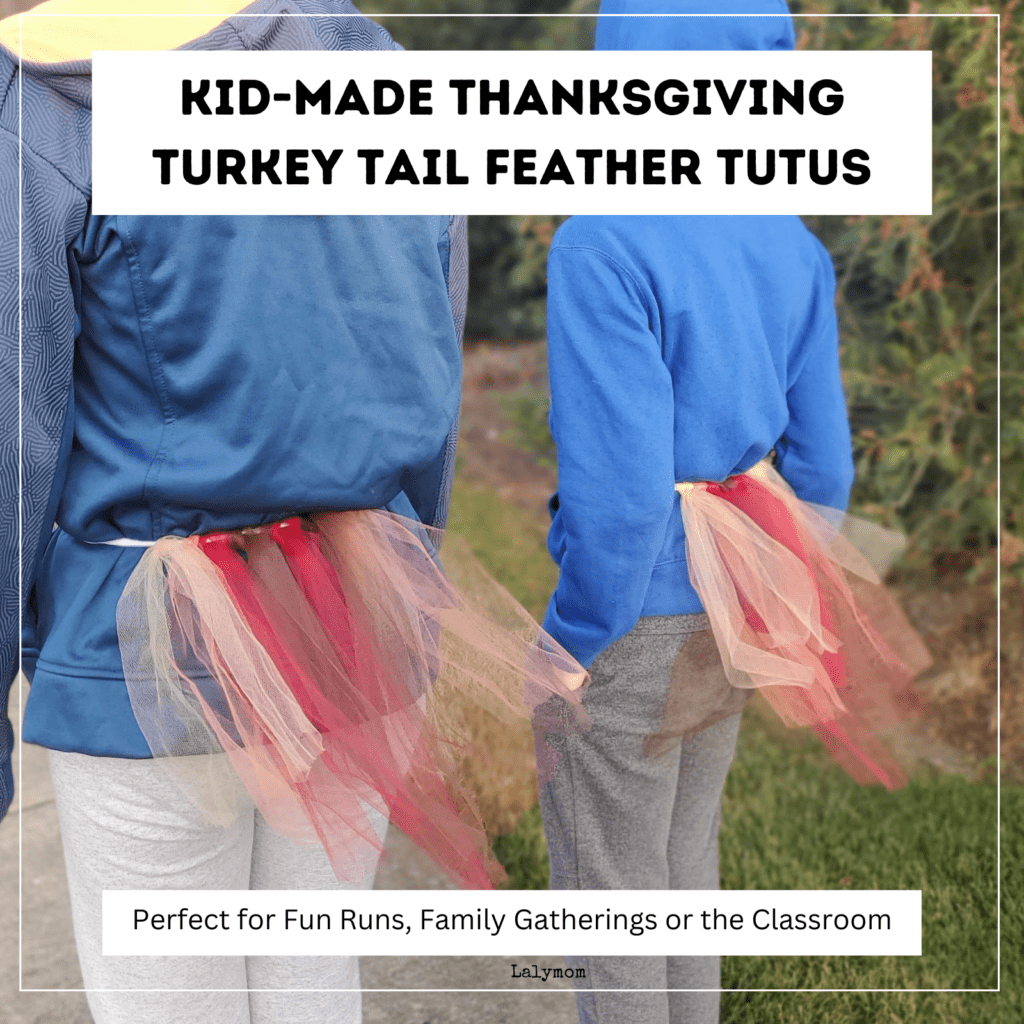
Quick Prep Thanksgiving Tutu Craft- Turkey Tail Feathers for a Group
Today I am sharing a genius way to prep and make a DIY Thanksgiving tutu by yourself or with kids. This Thanksgiving craft is perfect for Turkey Trots, Classrooms or Family Gatherings. They make really cute turkey tail feathers for any event and are easy to prep for a large group.
If you like this idea, you can “roast two turkeys” with one stone by using the affiliate shopping links in this article, where you can buy all the materials for this crafts AND support the free content on my site at not cost to you. Happy Thanksgiving!
I have to tell you, I was so excited for this craft. We have seen thanksgiving tutus before, at Turkey Trots and thanksgiving parties.
You could easily buy pre-made Thanksgiving Turkey Tutus but we needed a Thanksgiving craft for participants of an upcoming Turkey Trot. The crafts had to be easy enough that kids could make them, and since we'd be outside we wanted something that didn't involve paper.
What made me extra excited was coming up with a way to prep TONS of these in a short amount of time and then to make them SO easy we could make them with a hundred kids at our Girl Scout Turkey Trot!
Please note that our version only had tulle on the back, to make them look like Turkey Tail feathers. This made them very affordable to fit within our Turkey Trot Budget and it was something quick the kids could do on-site, before the race began.
You could use the same method below to make a tutu that goes all the way around your torso, you'd just need more tulle and more time.
DIY Thanksgiving Tutu Tutorial
Below are the materials and step-by step instructions to prep and make your Turkey Tail Feather Tutus.
Check out my hack to avoid cutting every single piece of tulle, one-by-one. It really made this project quick and easy.
Question: How much tulle do I need for a Thanksgiving Tutu?
Answer: This depends on how full you want your tutu. In our case we only used around 2 yards each of 4 colors or tulle, for a total of 8 yards per tutu. However as noted above, we wanted to keep ours cheap and quick to make, so the tulle is only on the back like tail feathers. If you want your tulle to go all the way around you may need more like 25-50 yards total per tutu.
Thanksgiving Tutu Materials – Click the links for product and shopping info.
- Rolls of 6 Inch Tulle – To make the tail feather tutu as pictured, you will need 6 inch rolls of tulle. Figure 2 yards x The Number of tutus you are making in EACH of the following colors- Red, Orange, Yellow, Brown. So 2 yards per color, per tutu. For our 100+ girl scouts we bought 3 bulk rolls of each color tulle. Our group ended up being more like 125 so we didn't want to run out. For smaller groups your can also shop 25 yard rolls of 6 inch tulle.
- Elastic – Prepping this craft for a group meant we had to make the waistbands adaptable to different body sizes. We opted for an elastic waistband and measured out one on the biggest kid we had at home as our baseline.
- Scissors for prep- Don't grab your janky, oh-I-forgot-how-bad-these-cut scissors. You want good scissors. If you are prepping with a team, grab a pack of scissors or request that they bring some so everyone has a pair.
- Paper bags or ziptop bags- We were preparing the materials ahead of time so that our Girl Scouts could make the craft on race day. We had a group of older girl scouts on hand to help and show them how to make it but a teacher could also lead the class in making the craft. Having them separated into individual bags was helpful to ensure everyone had equal supplies. For the amount of tulle we chose to use, these small paper bags were more than big enough to fit the folded up materials.
Thanksgiving Tutus Prep Steps
These steps are for someone preparing the materials ahead of time, then someone else will put the tutu together.
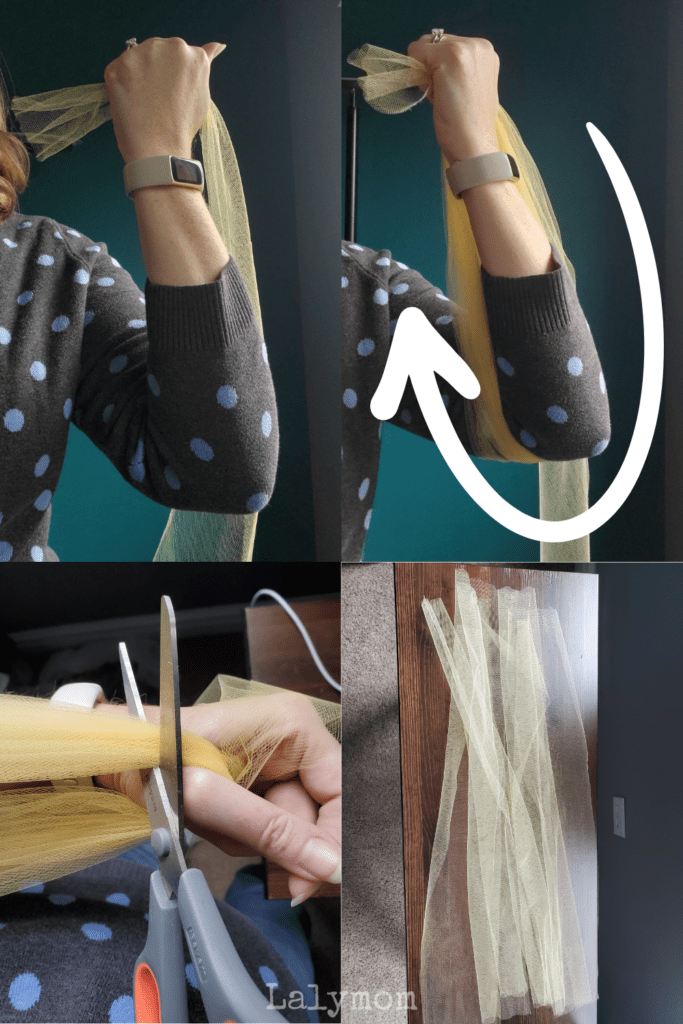
- Prep the Tulle – To make quick work of the tulle use this super simple hack to cut a lot all at once. Grab the end of the tulle in one hand so that the end pokes out the pinky side of your hand, and the roll comes off the thumb side. Now wrap the tulle like you are wrapping up a vacuum chord, down around your elbow and back up to your hand. Continue wrapping as many times as you can. Then cut across all layers of tulle ONCE and you are left with tons of individual lengths of tulle. For our hundred yard rolls we stopped to cut maybe 6-7 times? So instead of making thousands of individual measurements and cuts, you are just wrapping and cutting a bunch all at once! Voila! Keep your tulle separated in piles by color.

- Prep the elastic. You CAN use the same method for the elastic BUT it needs to be more precise, so you may need to use something besides your arm. Measure out one length of elastic with enough to be tied comfortably at the waist. Base this on someone on the bigger end of your group since a smaller person can just tie theirs smaller. If it is a group of adults, make them based on one of the larger adults. If it is a group of kids measure based on a larger kid in your group. The tulle is more forgiving than the elastic, so don't skip the step of making sure the elastic fits. Find a shoe box or other item that your baseline piece just fits around, end to end, without stretching. Now you can use this item to wind the elastic around. Use the same method of wrapping it around a whole bunch of times (careful not to stretch it while your wind) then cutting through all the layers at one point. Repeat until you've cut the number you need.
- Stuff the bags – Set out opened paper bags on your work surface, along with the piles of tulle and elastic. We used a ping pong table and moved the completed bags to the floor. Start by grabbing 2 of each color of tulle and layer them on top of each other. Once you have all 8 pieces in a stack, fold them up a couple times to fit in the bag then place the elastic on top of the tulle, since that is what people need first.
Repeat until you have stuffed the number of bags that you need.
Constructing a Thanksgiving Turkey Tail Feather Tutu
When your group is ready to assemble their turkey tutu, you can demonstrate how to do it like this. See video below for an easy, kid-friendly way to add the tulle.
- Take the elastic from your bag and tie it comfortably around your waist.
- Take one piece of colorful fabric (tulle) from your bag.
- Grab it in the center, folding it in half.
- Stick the center up under your elastic, letting the elastic hold it in place.
- Poke your pointer finger and thumb through the top of the tulle, and pull the tails through.
- Continue adding the pieces of tulle until they are all on.
- Move your tail feathers to the back, spaced out as far apart as you prefer.
Check out this quick demo video on how to attach the tulle. My tail is all crumpled because I sat on it in the car, lol, but when you make yours they will be nice and cute.
That's it- You just made Thanksgiving Tutus for a whole group! I hope you enjoy this fun and easy Turkey Day Craft. Happy Thanksgiving.