Must-Read Tips and Ideas for Using Shrinky Dinks
There's so much fun and learning to be had using Shrinky Dinks! Come read tips and tricks for shrinky dinks, plus oven temperatures..basically everything our family has learned throughout all our Shrinky Dink making activities. Partner affiliate links are used in this post.
We sure have had fun in the Lalymom household with our Shrinky Dink Crafts! We have tried out clear store bought shrink film, printable injet shrinky film, and #6 plastic for shrinky dinks.
I wanted to put together a quick list of tips for using them since we have learned a few things with each new idea! I've got our basic baking process for when you don't have directions, such as when you make them out of #6 plastic, as well as tips for success! (affiliate links are included for your convenience.)
Related Article: Epic Halloween Shrinky Dinks Ideas for Kids & Adults
Shrinky Dinks TIPS FOR Cutting and Coloring
These are the tips and tricks that we have found to be the most helpful in preparing Shrinky dinks:
- When cutting shrink film try to cut smoothly, rounding any sharp corners and trimming off snags.
- Punch any holes (for keychains or necklace loops) before you bake them and remember that holes shrink too.
- To color shrinky dinks, it is best to use sharpie type permanent markers. Keep in mind that colors darken as the plastic shrinks.
- You can also use colored pencils to color shrinky dinks, but the standard, clear kind will need to be sanded lightly in order for the color to transfer onto the plastic. Colored pencils work best on Ruff N Ready Shrinky Dinks, sometimes referred to ask Frosted Shrinky Dinks.
- For favorite characters or specific designs, you can print them on paper and trace with your markers onto the shrink film.
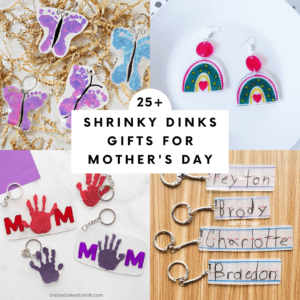
Related Article: 25+ Shrinky Dinks Mother's Day Gifts to Make
How To Make Shrinky Dinks:
If you are using #6 plastic, or you no longer have the instructions for your store bought shrink film, below is my basic shrinky dinks making procedure.
If you have store bought shrinky dinks though, always defer to the shrinky dinks oven temperature on the directions on the package, but I have listed common oven temps for various brands of shrinky dinks further down on the page.
- Pre-heat your oven to 350 (or the temperature on your instructions). I like to open a window or turn on the stove vent too. Some people find baking them gives off a plastic smell.
- While it warms up, draw and color your design on your shrinky dink.
- Cut your shape out smoothly, punch any holes needed for keychains or necklaces (remember holes shrink too!)
- Prep your Shrinky Dinks Pan: Baking directly on a cookie sheet is fine, but taking one or two extra steps will help ensure that your shrinky dinks don't curl as bad: Bonus tip 1. Do this one as often as possible. Line your sheet pan with a piece of parchment paper that has been folded in half, and place plastic pieces in between the layers, ideally close to the fold. Bonus Tip 2. Place an oven-safe wire baking rack, placed upside down, over the parchment paper, so that the surface of the rack is about a centimeter or so above the shrinky dinks, but not actually resting on them. This should keep the pieces from totally jack-knifing and sticking to themselves without pinning it down to your baking sheet. The point is to put something just above the pieces, not press them down flat as they bake.
- Bake Your Shrinky Dinks. How long it takes to shrink your shrinky dinks will vary a lot depending on the brand you use, the size of the pieces you are shrinking (larger takes longer) and even how well your oven is heated. See what the directions say on your packaging, and keep an eye on the parchment, to see if you see it moving. A couple extra minutes won't hurt. Usually small pieces take 2-3 minutes, but bigger pieces could take several minutes longer.
- Remove from the oven, move the wire rack and place the parchment on your counter or other heat-proof surface and press down on them with a hard, flat spatula or your oven mitt. You could also lay something flat on them. This will help make sure they do not curl as they cool.
If they haven't fully finished shrinking you can put them back in to let them finish but the plastic will have to heat back up again, so it may take just as long as the first time you put them in.
Buying Guide for Shrinky Dinks
Store bought shrink dinks from many brands:
Clear Shrinky Dinks, best suited for markers, are available from many different companies now, so I recommend buying based on how much you need, which varies quite a bit by brand:
- Shrinky Dinks Brand
- Graphix Brand Also available in a 50 Page Shrink Film Bulk Pack, which we love.
- Shrink Film Jewelry Kits these days come with jump rings, keychains and a whole punch so you have everything you need for jewelry and gifts.
White, Frosted or Ruff N Ready Shrinky Dinks are best suited for colored pencils.
- Graphix Brand
- Shrinky Dinks Brand
Inkjet printable shrink film is also fun to play with.
- White inkjet shrinky dinks are available from Shrinky Dinks and Graphix
- Clear inkjet friendly shrinky dinks are available from Graphix. I have not tried them.
I have seen colored shrink film paper but the reviews are so bad on them that I have not tried them and do not wish to link to them! Yikes!
DIY Recycled Shrinky Dinks
As mentioned above, clear #6 plastic, often used in restaurant takeout lids, are a perfect substitute for store bough shrink film.
In Chicago where I live, it is actually the one common plastic that is NOT accepted at recycling centers. If your lid has a texture pressed into it, it may or may not show after baking. You will have to give it a try! We have used #6 plastic several times, including for our easy Interlocking Building Discs.
Tips for Baking Shrinky Dinks
Baking Shrinky Dinks can be a nerve-wracking experience if you have never done it before. Here are a few tips on what to expect so you are not worried while making them.
- Different shrink film cut to different sizes all take differing amounts of time. Check after a 3-4 minutes for smaller pieces. The larger ones I have done took 15 minutes, the smaller ones only a few minutes. This makes sense if you think about it: smaller pieces have less plastic that needs heating!
- Again, it does not seem to hurt if they are in for a few minutes too long.
- If you do not place a light pan or wire rack on top, there may be a moment when you freak out because the shrinky dink curls up like crazy. The parchment helps keep it from happening to a degree, but it is TOTALLY natural for shrinky dinks to curl up, and as long as it doesn't fold up and touch itself, it will flatten back out by leaving it in the heat.
- If your piece curls so much that it touches and sticks to itself, use a heatproof tool to try to pry it apart. There might be a small blemish left where it was touching. Slender pieces curl and stick more than larger, wider, more uniform shapes. For example, a candy cane shape would almost certainly curl up on itself, but a square is wider so it would curl less. Placing the wire rack over it (but not touching it) will help stop that! Also, if you are doing a handprint shrinky dinks craft for Mother's Day, for example, do not cut between the fingers, leave it as a solid oval. The tiny finger pieces will have more of a tendency to stick to themselves.
- Again, colors darken with baking due to the shrinking which concentrates the color. If you need something to be light colored, make it as light toned as you can to start with. Sky blue turns to darker blue, for example. On the printable inkjet shrinky dinks, you can decrease the intensity of the printing to help colors come out the way you want them.
- Sizes will also vary with plastics. Some shrink more than others, and sizes may become distorted.
- As mentioned above, I like to use parchment paper on a baking sheet under my pieces as well as a layer on top, as well as a light pan or rack to keep curling to a minimum. However using this method means that you cannot see the plastic as it shrinks and you will have to take the pan and parchment off. For this reason I tend to set a timer for 10 minutes and check it then, rather than opening the oven several times.
Oven Temperature for Shrinky Dinks
Always refer to the packaging for your brand, since there are so many brands of shrinky dinks. If you have lost your instructions for your shrinky dinks, I have listed the oven temps for several shrinky dinks brands below:
- Shrinky Dinks Brand – Package says 325F but many report better results at 350
- Dabit Shrink Film – 165C/329F
- Graphix Brand – Package says 300-350.
How Much Do Shrinky Dinks Shrink?
People often ask how much they can expect their shrink film to shrink. How much a shrinky dink shrinks will vary by brand and how it is cut…most brands of shrinky dinks shrink roughly 1/3 the size of the original but below is how you can know for sure. The reason this is important is that I have had one brand shrink more than another, AND I've had pieces that shrink more in one direction than the other, so they do not always shrink exactly perfectly.
If you really want to know exactly how much your shrinky dinks will shrink, I recommend you make a guide rule using the brand you have:
Take a ruler and create a shape based on the measurements of your ruler. It can be a scrap or half a sheet of shrinky dinks. Either trace out your ruler or mark out several inches matching the ruler in each dimension, height and width. Bake it at the temperature listed on the instructions. For best results fold a piece of parchment in half and stick it inside, right by the fold of the parchment paper while you bake.
It may take longer than usual because it is a larger shape.
Once this is fully shrunk, you will have an exact representation of how much yours will shrink in height and in width (measure the resulting piece to see if the width and height shrink at the same rate).
Here is a great example of a shrinky dinks guide rule, where she also bakes them with the colors she uses so she knows how much they darken after baking.
Shrinky Dinks Project Ideas
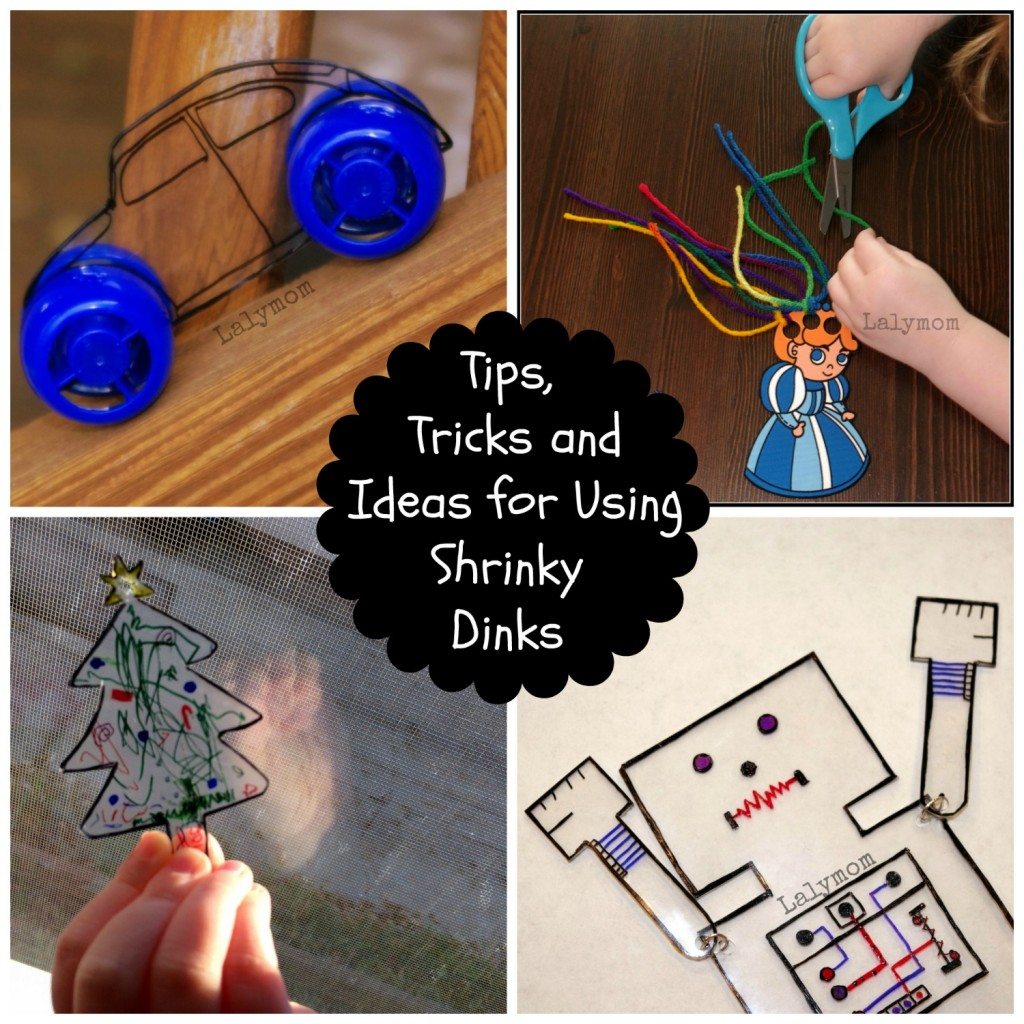
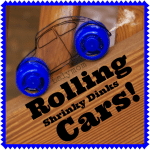
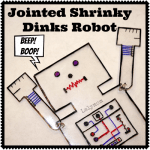
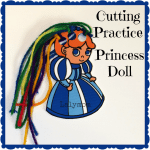
In the past we have used shrinky dinks to make homemade toys. We've made a jointed robot, rolling cars and trucks, a cutting princess doll and personalized I spy bottles. Come check them out! Have you made anything with shrinky dinks? I'd love to see it!!
We also made Christmas ornaments, as featured in the 25 Frugal Days of Christmas Series!
What have you made using shrinky dinks? I'd love to see it! Either send it to me by email or share it on my facebook page– I'd love to add it to my Shrinky Dinks Fun Pinterest Board!

Hi! I’m in the process of making some Shrinky Dink accessories for my daughter on my blog and I linked to your site as a resource for tips and tricks using Shrinky Dink. I hope you don’t mind. Please let me know if you want me to remove your link. Thanks!
We tried and the only thing that worked from curling our kids handprints up was using two wax paper sheets, placing in between and placing very strong magnets on all four corners. Worked perfectly! Using the pans made ridges and unwanted prints
After I pulled my shrinky dinks out of my oven the top was blurry. Do you know how that happen? If so do you know if there is a way to fix it?